Advice for a New Zealand Campervan Trip
To Me, The Only Way to Explore New Zealand
Having spent three weeks in New Zealand, I can’t imagine exploring the country without a camper van. The cities are nice but unexceptional - each feeling like dense suburbs with suburb-quality food and shopping. Auckland, Christchurch, or Wellington alone certainly do not justify the expense and time commitment of flying to the Kiwi nation.
The nature, however, is truly exceptional - and the government has invested extensively in infrastructure to make sure it’s easy to explore its abundant landscapes. To get to all the sites you want on your own, you will need your own transportation (unless you’re hitchhiking). Public transportation will get you between towns and cities - but the gems are all the stops en route. And if you’re anything like me, a group tour experience through the islands is just out of the question.
What sold me on a camper van versus a car with a tent was the flexibility of freedom camping. If you rent a self-contained camper van (one with waste water, a toilet, and maybe by time you read this, some sort of shower), then you can park and camp almost anywhere in the country (with some areas specifically restricted). Plus, a camper van allows for the comfort of a bed and a small fridge (although ours broke).
As we prepared for our campervan trip through New Zealand, we found the existing blogs a bit sparse on basic logistic questions. So, here is my best advice for preparing for your trip - with a focus on the basics.
Prepare yourself, though, because this post is much longer than I anticipated it would be. I think I learned a lot on the road. Don’t forget to check out our itineraries for a one-week trip in the North Island and 9 days in the South Island.
A Reasonable Budget for Two People
To travel around New Zealand in a camper van with two people, drink a flat white most days, dine out rarely, buy whatever wine and beer you want from the store, and never really skimp on entrance tickets, I would expect to pay about $150 a day per person. The trip won’t be luxury but it will be exquisite - and you won’t be left feeling like you missed out on anything. I have trouble imagining keeping it below $130 for two people without losing out on some important experiences.
In a van like ours (2-berth), you can travel up to four people (two in each bed). It would be cramped - but that may allow you to drop the per person cost below $100 a day.
If you want some more premium activities (like paragliding, skydiving, or more dining out), then you’ll need a higher budget.
The $150 a day does not include the flights to and from New Zealand - which are often very expensive.
What to book in advance - And WHEN
One of my biggest points of confusion in the New Zealand trip was the heated urgency of blogs suggesting to book in advance. I like to travel with flexibility and felt pressured to pre-book everything as soon as possible.
The truth is there are some things you MUST book in advance if you’re planing a camper van trip in New Zealand. Most other things (like campgrounds and tickets) can be purchased the day before without issue. Here’s the run down of what’s important.
Six Months to a Year Out - Flights
This section is only relevant if you’re price sensitive. If you’re not, you can always book flights whenever; they will just be expensive.
If you are price sensitive, first decide how long you’re planning to stay in New Zealand and your approximate dates. Flights to New Zealand are expensive, so you’ll want to monitor prices (using something like Skyscanner) to get the best deal you can. It may be cheaper for you to make a secondary stop (like Singapore or Taipei) and explore a second country than to fly directly. This would mean booking a multi-country tip instead of a single round trip.
(My advice for holiday length at least 18 days if you’re doing both islands, at least 10 if you’re doing just the South Island.)
Four Months to a Year Out - Camper Van, Hotel / Hostel Lodging, Domestic Flights
You will then want to reserve your camper van rental as early as possible because, especially in peak season, many companies will sell out six months in advance. To get your rental locked, you will need to know your date and place (Auckland or Christchurch) of pick up and drop off. If you’re exploring only one island, then your pickup and drop off points will be easy because they will be the same city. If you are planning to explore both islands, then I recommend doing point to point (starting in one island and ending in the other) so that you only have one ferry ride as the ferries sometimes go out of commission and can mess up your plans. If one of the two islands is particularly important to you, start in that island so there’s no chance of the ferry stopping you from exploring it.
Once the camper van dates and locations are locked, if you’re doing point to point and need to fly from Auckland to Christchurch (or vice versa) on one side of your trip, you’ll want to book that flight as early as possible. Prices get high close to the day of. Again, this doesn’t matter if you’re not price sensitive.
If you need lodging in Auckland or Christchurch on either side of your camper van trip, I recommend booking it as soon as your days are locked. I hit issues with hostel availability in Auckland (as well as surge pricing) when I booked last minute. I didn’t in Christchurch where I had booked 4 months in advance.
Three Months to Six Months Out - Ferry Crossing
Next, you’ll want to lock down your ferry date as these sell out starting two or three months in advance. You don’t need to know your full itinerary, just your rough balance of North versus South Island. Try to give yourself at least 10 days in the South Island in this split.
Book As Soon as You’re Sure
Once these basics are booked, nothing else is as urgent. If you’re planning to hike the Tongorio Alpine Crossing, I recommend choosing your day and booking your shuttle as soon as possible. I also recommend booking a Milford Sound cruise if you plan to go, as those can sell out. If you aren’t comfortable driving on windy cliffs, don’t plan to drive yourself to Milford Sound. Instead, station yourself in Te Anau for an 8 hour day trip, or Queenstown for a 12 hour day trip. There’s not much to see in Te Anau, so make this decision purely based on how much time you want to spend on the road that day. (In either base, you’ll have to book a holiday park).
The Rest is Fine a Day in Advance
In our experience, nothing else was time sensitive for booking. We booked as we went, usually the day before, and never hit capacity constraints for anything else we wanted to do. If you get all of the above nailed down, you can leave the rest of your plan as flexible as you want.
Picking a Rental Company
Unfortunately, we started booking our camper van too late (only four months in advance) and many of the companies we were planning to go with had already sold out. We went with whoever we could find - which ended up being Lucky Rentals - and this was a mistake on our part. A quick read of the Google reviews would have notified us that they were not an amazing company.
Because I didn’t drive any of the other camper vans, I can’t give a concrete recommendation on which company to go with. Our rental company bought used vans from Jucy Rentals - and it was clear to me that the van was probably nice when it was much newer. While I hated the branding on the Jucy Vans, they seemed to be the largest rental company and have a fairly new fleet.
My best advice is to read the Google reviews for whatever company you’re looking at and compare based on renter experience - and to not just go on price. Cheaper companies usually rent out older vans - which come with problems and much worse gas mileage. Just based on the amount we spent on gas, I would guess the price gap between newer and older vans narrows a lot because of how much gas a NZ road trip takes.
Choosing a Van
In terms of which van to rent, the primary consideration is whether you want standing room in the van. We went with a two bed van with standing room, mostly because that was what was left when we were making our reservation.
Because of how much it rained during our stay in New Zealand, we were both very grateful for the standing room - but also acknowledge that the van probably would have been a bit easier to drive and have gotten better mileage if the van had been smaller. This is a trade off you’ll have to make - price versus comfort.
Beyond that, you’ll want to make sure that the vehicle is automatic (unless you are OK with standard) and that is a certified self-contained vehicle.
Where to Camp in Your Van
There are three main camping options: freedom camping (free, usually with no amenities), Department of Conservation (DOC) sites (flat annual registration rate for as many stays as you take, usually with some bathroom and water facilities), and holiday parks (campgrounds with water, electricity, bathroom, and kitchen facilities).
Each of the three has serious merits. A lot of blog posts are from travelers who only stayed in Holiday Parks - and I think doing so is a serious missed opportunity. Holiday Parks often are busy and lack scenic views; they have amenities but lack a true sense of camping. I went in expecting to freedom camp almost every night to save money - but we probably went 1/3 freedom camping, 1/3 at DOC sites, and 1/3 a holiday parks.
Freedom Camping
Leading into New Zealand, my biggest point of confusion was around freedom camping. Where it was allowed and how I would know. Once we started, it became very simple.
Freedom camping is allowed unless it is prohibited. Some cities ban it entirely (like Te Anau) and other cities have so few options that it means there just isn’t really a good spot (like Queenstown, Wellington, or Christchurch). Essentially everywhere else, you can pull over wherever you want and spend the night - unless there is a sign saying you can’t.
We learned early on that if you search “freedom camp” and “freedom camping” in Google Maps you will get some great results, largely based on user reviews. We found a beachfront spot in Otaki and an incredibly central parking lot in Renwick (prime wine tour territory) that had a public restroom. Freedom camping gave us some unique, secluded experiences - and if we were moving slower, I think we would have done more of it.
Department of Conservation (DOC) Camping Sites
One big surprise for me was how incredible the Department of Conservation camping sites are. If you register yourself and your vehicle (paying an annual fee), camping at any of the sites will be free. You just need to make a reservation online.
I was amazed how many stunning waterfront camping sites we stayed with the DOC and how conveniently located they all were. Beyond that, they each had bathrooms. Some even had showers (cold water only) and dumping stations - and one had compost.
Go ahead and pay for the DOC registration because, often times, when there’s a DOC site nearby it will be your best (and most beautiful) option.
Mix in Some Holiday Parks
Holiday Parks (campgrounds) are everywhere in New Zealand. They are the most expensive of the three options but they also come with hot water, electricity, water refill stations, nice bathrooms, and kitchens. In cities, they combine the cost of lodging with the cost of parking - and are usually conveniently located.
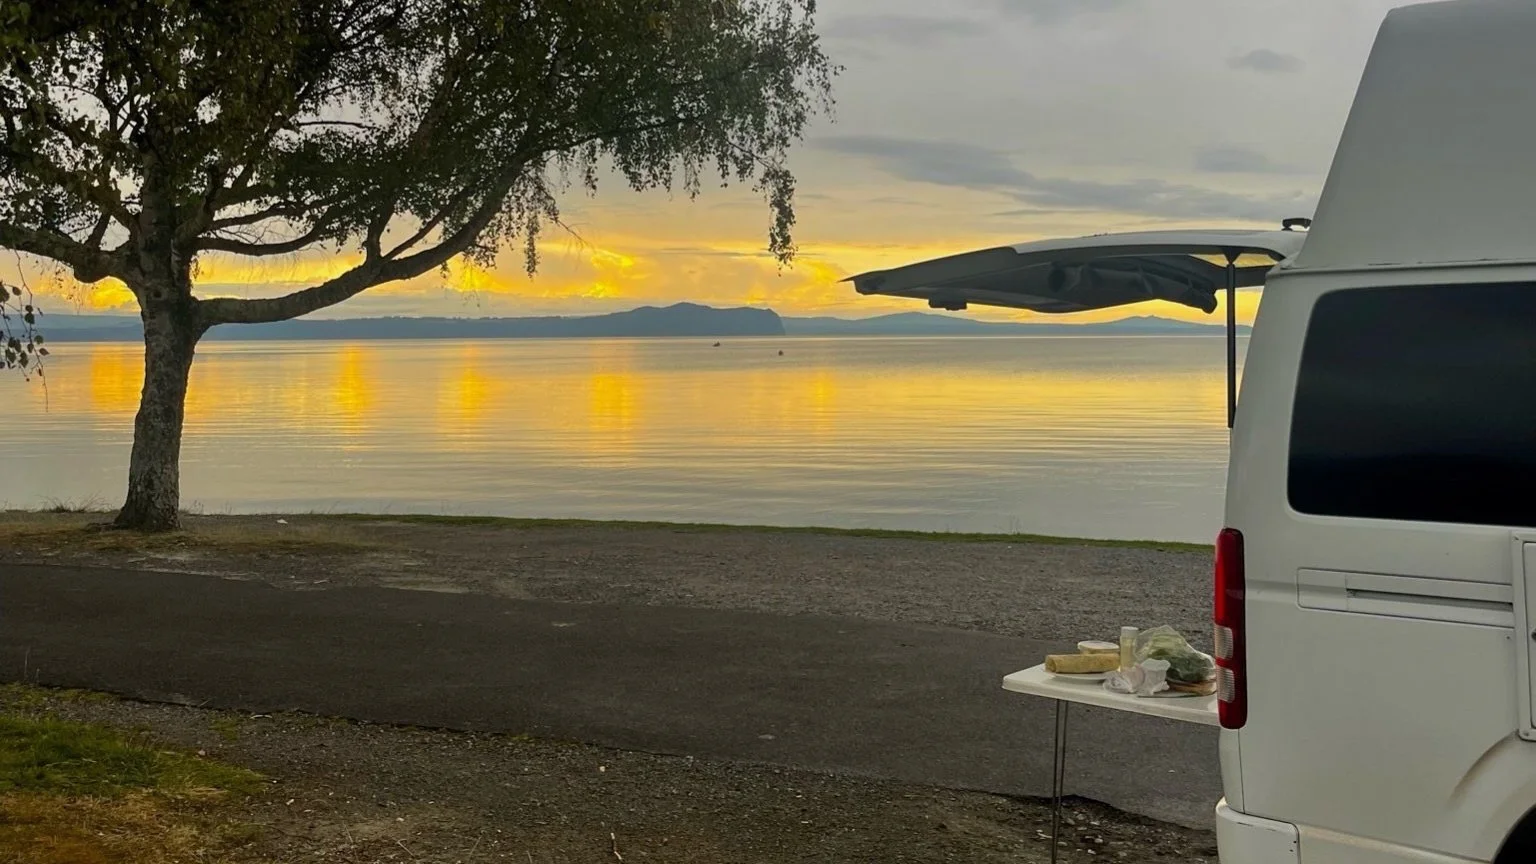
We began our trip expecting to stay at a holiday park at most 1 in 3 nights, and I think that’s about what we did. Each time, it felt like a real luxury, even if they were less private. To us, they were usually the best option in cities because they offered parking. We also stayed at a Top 10 Holiday Park at Lake Taupo because it was lakefront (an absolutely stunning view not available by either freedom camping or DOC site).
How Much to Schedule In Advance
I don’t recommend having a rigid itinerary for your New Zealand road trip - but I do think it’s worthwhile having a plan to make sure you see the spots most important to you and that you are getting to the ferry and drop off in time. Beyond the broad sketch of what you’re doing, I recommend leaving plenty of room for pit stops (especially for unexpected nature stops). I also recommend not over-scheduling yourself in the cities; unless you want lots of time to dine at restaurants and go out to bars, one day is plenty for each each major city (Auckland, Wellington, Christchurch).
Once you have your camper van and ferry dates locked, it’s helpful to plan some around those dates. My advice is to know which of the major attractions you want to hit (like Hobbiton, Glowworms, Tongorio Alpine Crossing, Marlborough Wine Region, Queenstown, Wanaka, Milford Sound and Mount Cook). If you put those on a map as well as the cities you need to get to (for drop off, pick up and ferries), you can figure out the best driving path and about how long it takes to get from major attraction to major attraction. I would budget at least 1.5 times (but better 2 times) the Google Maps suggested drive time when mapping this out.
Once you map out the most important spots on your trip, you’ll see how much extra space you have to go to other common destinations (like Rotorua, Abel Tasman, Waitomo Hot Springs, Hokitika Gorge, Blue Pools, or the Pancake Rocks). You’ll find that many of the most common destinations are on or nearly on the driving paths, so they are easy to add by adding a stop. The result of this planning will be an ordered list of what you expect to hit with the drive times between them. It’s easy to add approximate dates from there - but I don’t recommend booking them out (except for Tongorio and Milford Sound). You’ll be fine booking sites and adjusting plans as you go, making reservations the day before or day of. You’ll also get lots of advice from other campers - so you’ll want the flexibility to adjust course and take their recommendations.
Have a rough plan, but don’t tie yourself too strongly to it. If you’re looking for a template, you can borrow our itineraries for the North and South islands.
Download the Campermate App And Offline Maps
Before you go, download the CamperMate App and play around with its filters. You can search for almost anything - including campgrounds, dumping sites, bathrooms, public showers, Instagrammable spots, hiking trails, or propane refill stations. For most “where can I” questions you will have on the road, CamperMate will have a filter for it.
In addition, download offline maps in Google Maps for all of New Zealand. Service will be spotty, especially on the South Island, and you can use car directions in Google as long as the map is downloaded.
(While you’re at it, keep plenty of music downloaded for those roast playlists.)
Your First Grocery Shop
On your first day, you’ll want to go to the grocery store to stock up your van. I recommend immediately buying trash bags, paper towels, wet wipes, tupperware, cooking oil, spices that are important to you, and boxes of water. Throughout New Zealand, you can find 10L boxes of bagged water for drinking. It’s perfect for the van, and a half drunk bag is also perfect to drag along for hikes.
This is also a good time to buy some basic food for breakfast (for us, supplies for overnight oats, oatmeal, instant coffee and tea bags), lunch (think wraps or bread, nut butter, mayo, protein, hummus, veggies), snacks (chips, candy, fruit), and maybe wine or beer. We found when it came to dinner, we were better off buying according to a plan instead of just stocking up because we cooked something new every night.
Showers and Bathrooms
One of the Ew! points of the self-contained camper van is the portable toilet. We had a clear rule between us that we would never use it. Following that rule was incredibly easy because there are restrooms everywhere (and because we are both fine peeing on the grass). You can always pull over to a gas station or a cafe to go to the bathroom while you’re on the road, and most of the nature stops have at least a pit toilet. Especially when you’re going to hike, carry toilet paper and wet wipes / hand sanitizer because it won’t be supplied.
The other Ew! point is showering. Because the DOC sites often have showers, this actually proved to be a minimal issue for us. However, we also learned that New Zealand has a strong culture of swimming - and that entry to a pool with shower facilities is easy to find and usually under $3. We would search for showers in the CamperMate app when we needed - and could even go swimming within the same fee if we wanted.
Charging, Electricity, And Cables
Unless you’re planning to go to a holiday park every night, your only charging option will be through a car charger. Either bring, rent, or buy a two-prong USB charger for your van so you can charge two devices at once. Make sure to bring USB cable charges for everything you need to charge on a daily basis. The passenger will always be in charge of making sure things get charged.
When you’re in Holiday Parks, you’ll be able to plug the van into electricity, so you can use sockets and charge everything you have.
Don’t plan on your camper van being Bluetooth compatible. Bring, rent, or buy an aux cord with whatever converters you need. (We found iPhone aux adapter for sale pretty much everywhere, so don’t worry if you can’t find one). A road trip is incomplete without music, after all.
Dumping and Wastewater
If you’ve never had a camper van before, the water and wastewater management may be intimidating. Don’t worry, it’s easy.
To dump your wastewater, you will attach a large hose to your wastewater tank and put the other end in a hole in a dumping station, then release your wastewater tank. There are wastewater stations at every holiday park, some DOC sites, and also throughout the country at public dumping sites (searchable on CamperMate). This is a little gross - but it’s really not bad, especially if you don’t have toilet waste. Just triple check your hose is securely attached before releasing the tank. Try to dump at least every few days.
As far as the clean water, you can refill at any holiday park and sometimes at the public dumping stations. You just attach a hose to the water source and put the other end of the hose in your water tank spout, and fill it until it overflows. I recommend filling it every chance you get. It’s a real pain to be caught without water.
Don’t assume that every water source is potable. Unless it specifically says potable, boil first.
Budget for lots of gas And Fill Often
Camper vans get approximately zero miles per gallon - so you’ll be filling often. Gas is about three times as expensive in NZ as it is in the US, so this get’s pricy fast. I would expect to pay at least $50 a day in gas on average. If it’s less, you’ll have more money for flat whites.
On the South Island, you can go for long stretches without a gas station, so try to never let you tank go below half a tank. Fill up when you see a station if your approaching the half mark. You’ll thank yourself when you hit a long stretch with nowhere to fill.
It’s Not So Hard to Drive on the Left Side
If you’re coming from the US, it may seem intimidating to drive on the opposite side of the road. The adjustment will happen quickly though, especially because New Zealand has tons of signage and arrows to remind tourists of which side of the road to drive in. In addition, the drivers side is on the opposite side of the car, so the sensation of the driver’s side facing the middle lane persists.
You will almost certainly take a while to figure out the blinker and windshield wipers - which are also on opposite sides (blinker right, windshield wiper left). Luckily, all those mistaken windshield wipes are harmless.
Bear Right and Be Ready for Seat Height Illusions
Camper vans are most likely far taller than you’re used to for driving - which will distort your perception. On either side of the car, you will probably overestimate how close you are to what you’re seeing (the driver will overestimate how close they are to the middle line while the passenger will, in horror, overestimate how close they are to the curb or cliff). Remember that this is a bit of a mirage, and do your best to drive close to the middle line. The camper van is wide, and the curb is sometimes a cliff. It’s much better to drive on the line then over the curb.
Drive SLow and Pull Over Often
Camper vans are large fuckers, so they don’t always go that fast. Ours (which we named Butter) could go all of twenty miles per hour when going up a hill. Be prepared to go as slow as you and the van need; never rush, especially on windy roads.
Most of New Zealand doesn’t have passing lanes; instead the expectation is that slow vehicles will pull off to the side and let vehicles pass. You will often be that slower car, so keep an eye on the cares behind you and let people pass whenever needed.
City Parking
Camper vans are often too tall for parking garages and can be really challenging to parallel park or get into a tight parking spot. When staying in a city overnight, I recommend getting a spot in a holiday park, which usually are centrally located. If you’re visiting just for a day, I recommend parking a bit outside of the urban core and walking a bit further into the city or taking public transit.
One of the most stressful moments of our trip was trying to get out of a parking lot when we realized we would be unable to get into a spot - and that we were maybe half an inch away from a very expensive car. It was a mistake we made once and never attempted again.
What Clothing to Pack
New Zealand can be any season at any time, particularly on hikes, and it can rain at any moment anywhere. Pack for all four seasons, including in summer, and bring layers for your hikes.
Cooking is Easy
Your camper van will have a two stove burner, which is perfect for cooking simple meals like pasta, stir fries with rice, burrito bowls (or wraps), or making soup. You’ll thank yourself if you stick to simple recipes; keep yourself under six ingredients and never needing to cook more than two things at once. You can make some really lovely, simple meals like this.
If you are a mixed group of meat-eaters and herbivores, an easy workaround is keeping a rotisserie chicken and cooked tofu or beans in the fridge. Then you can cook a veggie meal base and add proteins separately.
Shit Will Go Wrong. Find it Funny.
Pretty much every single night, we’d drink a bottle of wine and say to ourselves “That was a perfect day.” Except no day was. Everyday had something go wrong - our fridge would break, we’d run out of water or propane, someone would be rude, or so on. If we ever dwelled on the things that went wrong, we could have found ourselves not enjoying the incredible journey in front of us. Instead, every day we laughed our asses off at the things that went awry - and really appreciated the things we found beautiful.
Always stay calm and move forward. There’s too much going right on a NZ time to fret about the things going wrong. And things will go wrong on a camper van trip, constantly.